Showing posts with label wood grain. Show all posts

Sunday, November 12, 2017

Holiday Card Series 2017 | Card #5

Hi Friends!  I am sharing today with you Card #5 in my HCS - I know, I have skipped  Cards 2-4, but you can easily see those cards and their videos by visiting my Youtube Channel here.  And, frankly I've forgotten to write up a blog post for those cards as well, and I wanted to catch up quickly, so I though this would be the quickest way.

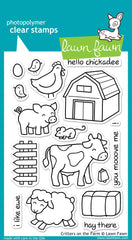
Today's card showcases the popular Holiday Style set from Sunny Studio released last year.  I wanted to get it back out today since I didn't get to use it much last year and it is just a fantastic set!!


I also love the look of Kraft and white!  Such a classic look!  And, I love the added pop of color with the red ornament!  

This ornament is so easy to stamp!  I know some have a hard time with layered stamping, but this set is a very easy one to line up!  

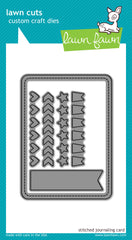
I heat embossed the white branches with white pigment ink from Simon and white embossing powder from Hero Arts.  And, then I used the coordinating die to die cut them out.  On the background, I used the Lawn Fawn Stitched Wood Grain die to give some extra texture.

I thought the edges of my Kraft card stock panel could use "something" so I took a sponge dauber and inked all around with Walnut ink from Lawn Fawn and that really gave it that finished look.  For the ornament I used the Floral ink cube set from Altnew and I used the Coral Berry and Ruby Red to stamp the layered images of the ornament.  

For the sentiment I used the Season's Greetings die from Simon, and die cut some kraft and silver sparkle card stock and stacked them one on top of another to create a dimensional layered sentiment and it really helps for it to pop off of the kraft.

I have both the video and the supply list below.  Thanks for stopping by today, and I will be back soon with Card #6!


Monday, May 19, 2014

LSC # 82 Distress Mania

Welcome back!  It is time to introduce a new challenge over at Lawnscaping!  So, do you like the Distressed look?!  There are so many ways to achieve this look!  We want you to show us your Distressed Project!

Here is my card!


I used the Critters on the Farm set by Lawn Fawn.  I think think is one of the cutest sets, and I have used it for many different projects.  To feature distressing on my project - I, first took a piece of wood grain card stock and two different colors of Distress Inks - Weathered Wood and Vintage Photo and just inked up an area big enough so I could stamp my barn image from the stamp set. Once I achieved the look I was going for, I colored with Copic Markers R29, E37, C5 and C7.  It makes it look like a vintage barn. I stamped, cut and colored my hay bale.  I also die cut some grass out of the green polka dot papers from Let's Polka.  I adhered all of these elements to a die cut piece of Sea Glass card stock die cut from the Stitched Journaling card die.  I also used my newest dies from Lawn Fawn the Spring Showers - the sun and one of the clouds.  I just LOVE that stitched border!  I adhered my main panel to a piece of white card stock that was die cut from what else - the stitched frame from the Femme Frames set from Mama Elephant!  Again, addicted!  Then, I adhered all of that to a piece of yellow polka dot paper also from the Let's Polka 6x6 pad.  All of this got adhered to a Sea Glass A2 size card base, and to add a little bit more distressing...I roughed up the edges of my card base, and added some Vintage Photo Distress Ink around the edges too.

OH!  and that sun - I took another piece of white wood grain card stock and used one of the new Prima Bloom Sprays in Sunshine to color the card stock and then used the sun die from Spring Showers to die cut it out...love the texture and the color!!

Hope I have inspired you today!!  Our sponsor this week is the super awesome Lawn Fawn!  And, they are about to release new products!! YAY!

See you soon!
Kari


Saturday, September 7, 2013

You Make....

It's the weekend!!  YAY!  Even better than that - it is the start of my vacation to relax and do something else besides work!!  :)

Today - I am here to share a card with you that I made using the Simon Says Stamp set Card Exchanging Friends.


I also used the new ink In Colors for 2013-2015 from SU!  So pretty - these colors together are so yummy!!  So up my alley!!  I stamped out one of the banners from the stamp set several times - and I used Crisp Cantaloupe, Coastal Cabana, Strawberry Slush, Baked Brown Sugar, and back to Crisp Cantaloupe.  My card is a 4.25 x 4.25 square card. I then wanted for each banner to have a sentiment in it - so I stamped " You Make" in the first banner and then continued down with each different sentiment from the same stamp set.  I adhered my stamped panel to a piece of Wood Grain card stock - also from Simon Says Stamp, and then adhered that to a Coastal Cabana card base.  To finish off the card and bring in more of the strawberry color - I added to bakers twine that closely matched that color.  

So simple  - yet colorful and fun!!  

Thanks for stopping in!!

Kari 

Sunday, August 18, 2013

Thinking Of You Today

Good Sunday to you all!  Hope everyone's weekend has been a good one!  Today, I wanted to get a little crafty time in, and pulled out some supplies that I don't use often, but still love!  I have THIS Sizzix and Hero Arts Stamp and Die set that I think is the prettiest out of all of these sets ( IMO) - and wanted to break it out as I don't use it often enough.


I also don't use my Copics all that often.  I am not a big person on coloring, but I do like to do it every now and then.  I stamped the biggest butterfly and flower images of the set with Memento Tuxedo Black ink, and colored the images using RV34, RV19, BG13, BG15, YG63, and G05.  Then, I used the coordinating Sizzix dies and die cut the images ( which is the most fun part for me!).  I, then cut down a piece of Hawaiian Shores from PTI, and scored and folded to a standard A2 size card.  I, then pulled out some wood grain patterned washi I had that is about the same color and added to my card base to give a bit of interest and pattern to my card.  My sentiment also comes from the PTI set We Go Together.  To finish off the card - I just added some glitter using my Wink Of Stella pen.

Here is a closer look at the glitter goodness -


Enjoy the rest of your weekend!!  
-Kari