Hi friends! Today I am sharing card #2 in my Holiday Card week for 2018 and this card comes together super quick with the help of Concord and 9th!! And, this card is full of glitter sparkle and shine. Luckily - this is the best kind of glitter - no mess glitter!!
If you love the look of glitter - then this card is for you!! I used the Merry and Bright Die from Concord and 9th and I die cut it using silver card stock from Simon Says Stamp. I also used the Crimson Red to for my background!
The wonderful part of this card is that it took me less than 10 minutes to create!
For the inside of the card, I used the Very Merry Sentiments set also from Concord and 9th. To see how quickly my card came together, you can watch the video tutorial here.
Thank you all for stopping by! I will be back tomorrow with Card #3!
Hi friends!! This is my first blog post of 2018, and what a way to start by entering into the Lawn Fawnatics Challenge! I haven't participated since the very first challenge, so I am WAY over due. You know how it is though...LIFE gets in the way sometimes!
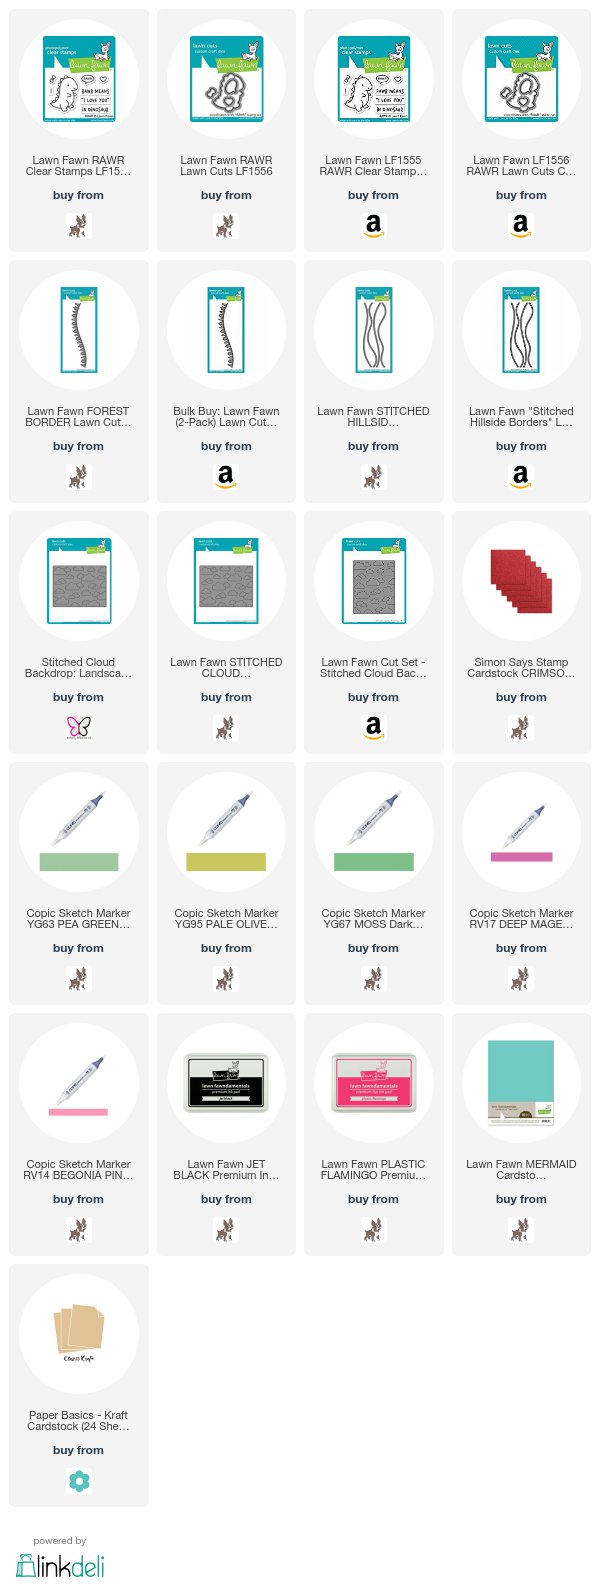
For my card, I wanted to use the new Rawr mini stamp set - this has got to be one of the more adorable dinosaurs, right??!! So stinkin' cute. What is fun, is you can create it to make it look like a girl dino or a boy dino!
I created a simple scene, but it is definitely representing all the female dino lovers - HAHA! I also created this card for a family members granddaughter! She is two years old, and absolutely loves anything dinosaur!! So - perfect for her!!
I used several die sets to create my scene including the Stitched Cloud Backdrop, The Stitched Hillside borders and the Forest Border. I stamped my dino onto some white card stock that is great for Copic coloring, and used YG63, YG67 and YG95 to color her in. I also used RV14 and RV17 for the speech bubble and the bow :)
I love how simple the scene is, but also very girly with the glitter red hearts!!
I had a fun time creating this lovey dovey dino card :) And, happy to enter it into the LF challenge!
Thank you all for taking time to visit! I hope to be back soon with another creation!! Until then, stay inspired!
Hi Friends! I am sharing today with you Card #5 in my HCS - I know, I have skipped Cards 2-4, but you can easily see those cards and their videos by visiting my Youtube Channel here. And, frankly I've forgotten to write up a blog post for those cards as well, and I wanted to catch up quickly, so I though this would be the quickest way.
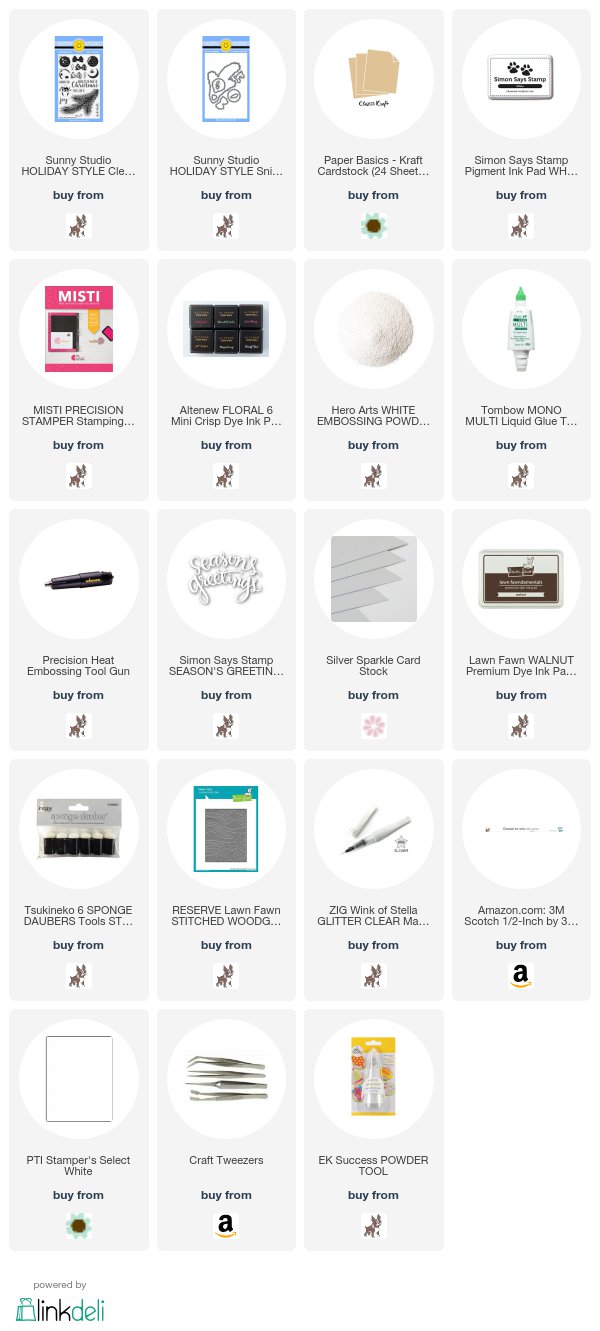
Today's card showcases the popular Holiday Style set from Sunny Studio released last year. I wanted to get it back out today since I didn't get to use it much last year and it is just a fantastic set!!
I also love the look of Kraft and white! Such a classic look! And, I love the added pop of color with the red ornament!
This ornament is so easy to stamp! I know some have a hard time with layered stamping, but this set is a very easy one to line up!
I heat embossed the white branches with white pigment ink from Simon and white embossing powder from Hero Arts. And, then I used the coordinating die to die cut them out. On the background, I used the Lawn Fawn Stitched Wood Grain die to give some extra texture.
I thought the edges of my Kraft card stock panel could use "something" so I took a sponge dauber and inked all around with Walnut ink from Lawn Fawn and that really gave it that finished look. For the ornament I used the Floral ink cube set from Altnew and I used the Coral Berry and Ruby Red to stamp the layered images of the ornament.
For the sentiment I used the Season's Greetings die from Simon, and die cut some kraft and silver sparkle card stock and stacked them one on top of another to create a dimensional layered sentiment and it really helps for it to pop off of the kraft.
I have both the video and the supply list below. Thanks for stopping by today, and I will be back soon with Card #6!
Hi friends!
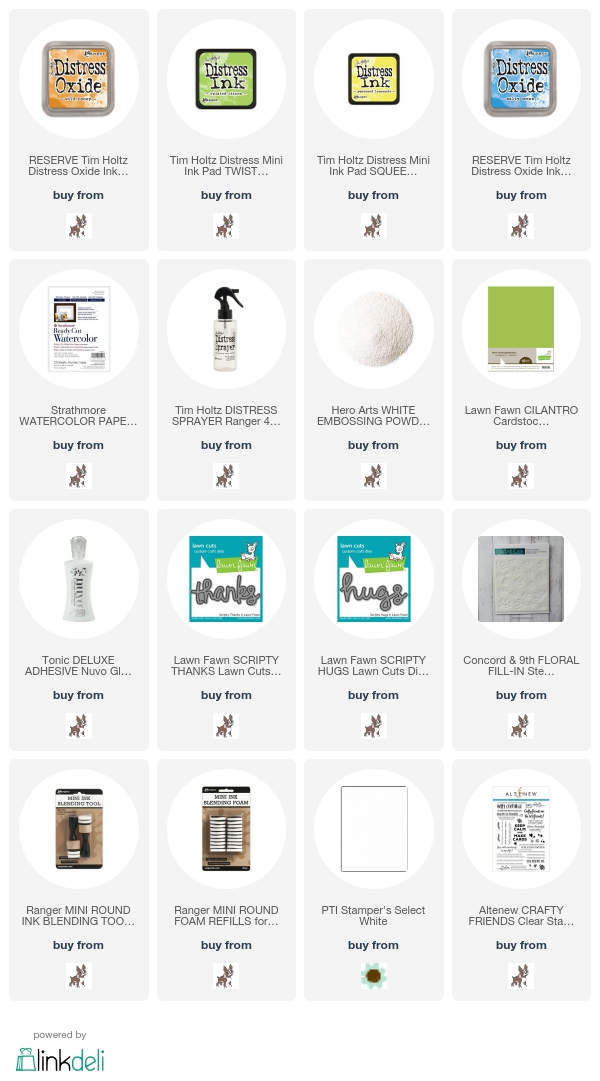
Today I wanted share how I used both Distress Inks and Distress Oxide inks together! It was a layering day as my inks were layered, my stencils, and my die cuts - HAHA!
I started out by using a piece of Ready Cut Strathmore watercolor paper, and used the direct to paper technique with my Squeezed Lemonade Distress Ink cube, and covered the entire piece of watercolor paper. Then, I took out my Fill In Floral Stencils from Concord and 9th, and used the Wild Honey Distress Oxide ink and applied the first layer of flowers. Then, to add detail to the flowers, I used the second stencil with Twisted Citron Distress Ink. Very bright, very summer appropriate!
I did the same thing with the blue card which was Salty Ocean Distress Ink, and Oxide ink with the Twisted Citron Distress Ink. The only stamping I did was the stamping of my sub sentiment from the Crafty Friends stamp set from Altenew. I also wanted to add a little sparkle and shine, so I die cut both the Scripty Hugs and Scripty Thanks dies from Lawn Fawn from Silver Sparkle card stock from MFT and layered it onto of a white die cut.
Love how they both turned out! I never get tired of playing with these inks, and you will see more from me in the next coming weeks for sure!! Have a great rest of the weekend!!