Showing posts with label embossing. Show all posts

Sunday, February 5, 2017

Quick and Simple Friendship Valentine's Day Cards | Two Ways


Hi my friends!
Today I wanted to share with you two cards you can create quick and easy using one stamp set for Valentine's Day for any of your friends.  You also don't have to give these as Valentine's Day Cards, but anytime of the year!

I used the Heart Smile stamp set from Concord and 9th.  Their products have been some of my favorites.  They actually came out of the blue for me.  I knew they of course existed in the stamping industry, but since I've purchased some of their products, I've really been drawn to their stuff!  They have unique stamps and dies, and I love that about them!

I used my MISTI stamping tool to stamp the large solid heart, and I used two ink colors from Simon Says Stamp, Sunkist, and Rosie Cheeks!  I love these two pastel like colors!  


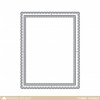
For this first card, I used the Rosie Cheeks color, and stamped it a few times getting a good saturated in color image.  I am stamping on my favorite white card stock, PTI stampers select white.  Once, I finished with this one, I moved onto the Sunkist color, and did the same.  I die cut both panels using the stitched frame from the Femme Frames die set from Mama Elephant.


I wanted to heat emboss my sentiments, so I used my powder tool first to prep the area of the heart, and then I stamped my sentiments and embossed in two embossing powders on each card, Gold and Liquid Platinum from Ranger.  I also added the arrow element to the Sunkist heart to added a bit more interest.

I backed the main panels with some PTI Hawaiian Shores card stock, and used the other die in the Femme Frames set to die cut the card stock.  

For the inside I stamped some sentiments from the Fun and Flirty stamp set from Paper Smooches, and added a heart to tie everything together.

For a final touch, I decided to add some shimmer with my Wink of Stella pen to the Rosie Cheeks heart and that completes both cards!

You can see all supplies used and the video tutorial below!  Thanks for stopping in today!  See you soon!


Monday, December 12, 2016

Holiday Card Series | Card #13 | Simon Says Stamp

Hello there!  Welcome to Card 13 in my HCS for 2016!  Today, I am using a stamp set that released last year with Simon Says Stamp that I didn't get to play with.  I also used the Crate Paper Bundled Up 6x6 pad also from last year!

Today's card is pretty simple, but I love the color scheme.  I love the embossed images to help add that extra "something" to the card


I used my MISTI tool to stamp out my trees as these are solid images, and I wanted to ensure that I got a good impression of these images.  


For the inside of my card, I decided to emboss just like I did on the outside to complete the card design.  For full details of how I put this card together, I invite you to watch the video tutorial! All the supplies used are listed below!  See you soon!

Kari


Thursday, October 27, 2016

Multi Colored Metallic Embossed Thank You Card

Hi my friends!
Today, I am here to share this card showcasing the popular set from Right At Home called Grateful Heart.  It has been one that I have used a lot over the past month.  It just has so many different and great images and sentiments for the fall season!

Today, I wanted create a card design with multiple metallic embossing powders, so I created a background using the thank you sentiment first, and stamping it with my Versa Mark ink, and embossing it with Liquid Platinum embossing powder.  I wanted to give a finished edge or border so I used the Holiday Ribbons stamp set to create this look, and I embossed it in Silver embossing powder.


Then, I really wanted to incorporate some Rose Gold embossing powder, so I stamped the pumpkin from the set onto a piece of vellum that I die cut with a cross stitched rectangle die.  I also wanted to give it a distressed edge and bring out more the Rose Gold embossing powder, so I coated the all four edges of my vellum piece and them embossed it with that gorgeous powder.  

I die cut my main panel using the rectangle frames from the Find The Beauty die set, and I tape them together to also create a frame.  I also did the same with a piece of pattern paper to compliment the embossing through out my design.  

I put all of my pieces together on my A2 white card base, and popped up my frame.  


I felt like I need something to finish off my card, so I added a few rose gold, sparkling clear and silver sequins.  And, that completes my card for today!  I love all of the different embossing looks on one card.  

Thanks for stopping by today!!  Be sure to visit the Right At Home Shop as the awesome Fall and Holiday is now available, AND there are coordinating dies for a lot of the sets for the release available now too!!  

Stay Crafty!


Sunday, September 27, 2015

Masculine Birthday Card | Lots of Embossing


Happy Sunday everyone!  Today, I wanted to share this tutorial for creating a Masculine Birthday Card.  I don't know about you, but  I don't make enough Masculine Cards, so it makes it a bit challenging.  For today's card, I did a lot of embossing, both heat embossing and embossing to add some texture by embossing with some dies.

This design is a little different for me, but I really like how it turned out!  I have the video tutorial as well as the supplies used listed, and linked below.

Make it a great rest of your day!  See you soon!!